I do a fair amount of freelance work in the nerd-therapy community filming panels about fandom psychology at various comic cons around SoCal. The brands I’d worked for in the past have been largely minimal and refined—think “Apple Store” aesthetic and not giving “let’s do therapy with the villains at Arkham Asylum!” I wanted to have some fun with the latest round of panels from Los Angeles Comic Con, so I decided to create some simple title animations using Blender. I’ll breakdown some of the others in future posts.
3D Dice Roll Animation with Blender
This first animation was pretty fun to build. I wanted to “roll for initiative” with From Initiative to Self Determination: Using RPG’s as a Therapeutic Tool. You can do this with simple rigid body physics and basic meshes in Blender (I’m using Blender 4.0 for all of these). I’m not an advanced user by any means, so I’ll write for a beginner’s skill level.
Delete the basic starter cube and a plane. Scale it up big. This will be the “ground” that your dice roll on. To make the plane act as the ground, select the object ➡️ go to the physics tab ➡️ Rigid Body ➡️ Set Type to Passive.
Next, you’ll need to add the dice. Right out the box, you’ll notice that Blender only has a few shapes in the Add Meshes Menu (Shift + A). Do Edit ➡️ Preferences ➡️ Add-Ons ➡️ and enable Add Mesh: Extra Objects .
Next, do Add Mesh ➡️ Math Function (😱MATH!!!😱) ➡️ Regular Solid. This will bring up a menu that allows to generate different basic shapes…Tetrahedron, hexahedron, octahedron, dodecahedron, icosahedron… ie, THE FLAVORS OF DICE YOU WOULD USE IN A TABLE TOP RPG!
Add as many dice objects as you want. I went with a nice a d4, d8, & d10 because they read well at a small final size. We’ll need to add these objects to the rigid body system.
Go into the physics tab for each ➡️ enable Rigid Body ➡️ set Rigid Body to Active (this means the object will move and bounce… ie, is not the ground or a wall). We’ll play around with friction, bounciness, and mass later.
Move you dice up into the “air” on the z-axis. Play the animation. Right now, they just fall from the sky and bounce. I wanted this to look like a proper roll… Someone holds the dice, swings their arm through space, opens their hand, and the dice spill out on the table, bounce a few times, and land on one side.
The beauty of 3D is that there are a million ways to achieve a look. Initially, I thought I could keyframe the dice to mimic the throw and physics would do the rest. That proved to be way beyond my skill level. HOWEVER, there’s an easier way. You can achieve a close enough look by simply having your dice roll off a sloped surface…which is pretty much what happens in an IRL dice throw.
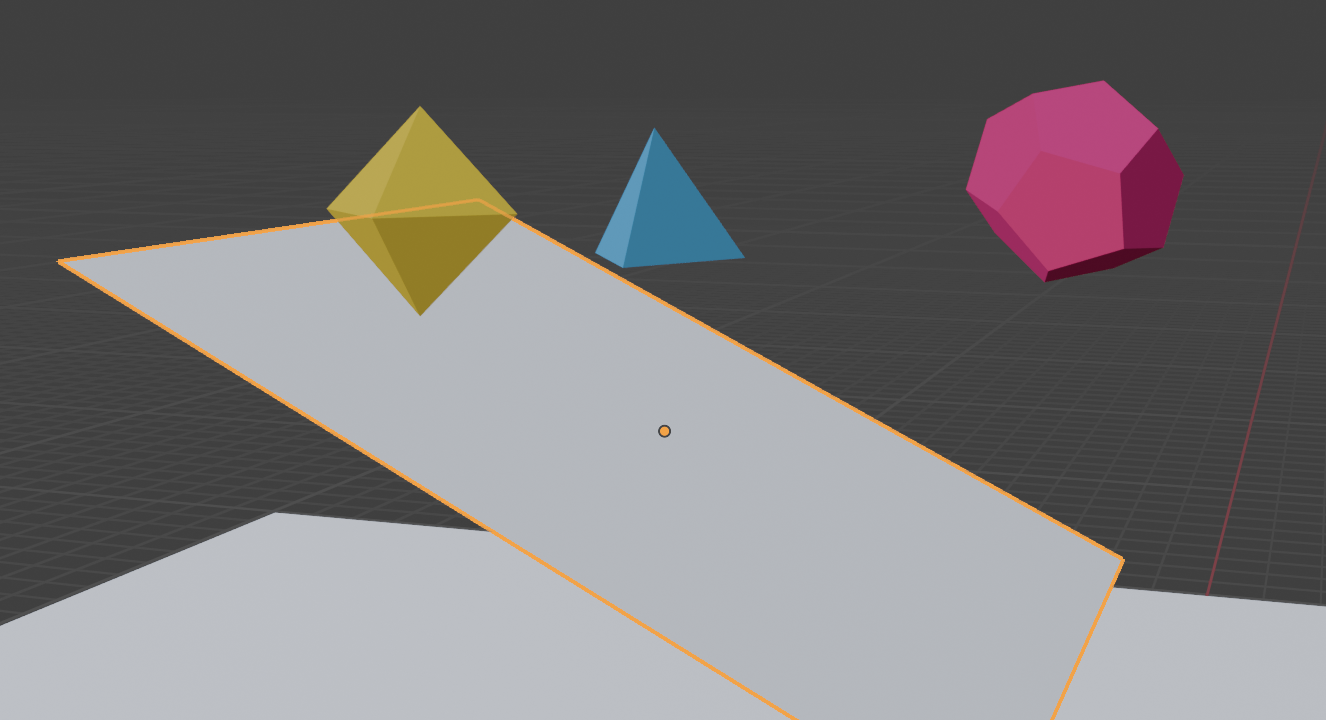
To do this, add another plane. Scale it up so there’s enough surface for your dice to roll on. Move it up into the air on the Z-axis. Rotate it on the X & Y to get the desired slope. Add the same physics properties as your ground plane (you could just duplicate the mesh with SHIFT + D / Alt + D for linked objects).
Position it under your dice. Play the animation! What do you notice?
With default settings, your dice are probably bouncing around all over the place. This next part is really trial and error. You’ll need to play with the positioning, mass, friction, and bounciness settings under the rigid body tab until it looks right. If it’s still not behaving right, you can add Collision physics and tweak those settings. Admittedly, I forget exactly what this does, but I have it in my simulation 😅.
When you’re getting ready to render your scene, you may want to hide your ground and slope. To do this, go to the Outliner Panel and disable the camera icon for the plane objects. When you render, Blender will omit those objects.
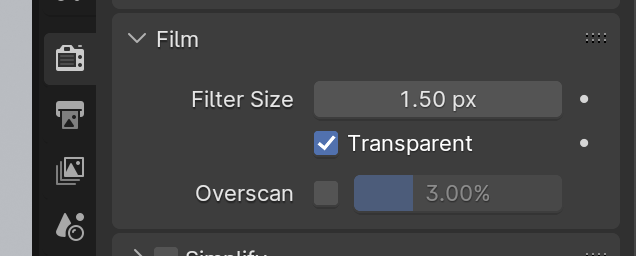
If you want to add a background later or superimpose the dice over other footage (say in Premiere), you’ll need to enable transparency in your render. To do this, go the Render Tab ➡️ Film ➡️ enable Transparent. This will give you an alpha channel in your PNG exports.
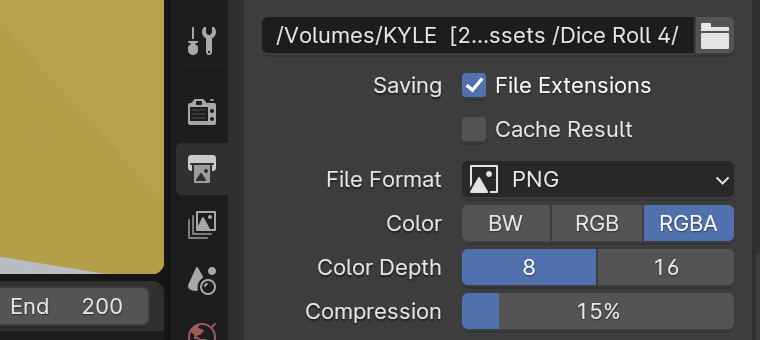
Speaking of exports, you may notice some weirdness when you go to render an .mp4 out of Blender like you would in Premiere or After Effects. I’ve found that the quickest and most fool-proof way to get your scenes out of Blender is to export as a series of PNGs.
Go to the Output tab ➡️ Format ➡️ File Format ➡️ Color ➡️ RGBA.
Every frame becomes one png, then you import those as an Image Sequence in your editing software.
Here’s how the simulation looks on my end! I wound up going with a pixel look for all of the panels I filmed this time. I’m a 90s kid, what can I say? Also, pixels can help cover sloppiness in your animations and simulations…something I really appreciate about stylized aesthetics.
Acknowledgemetns
No one exists in a vacuum. Blender is notoriously confusing at first glance. Fortunately, there are a tonnnnnn of tutorials floating around to help you figure stuff out. I usually do piecemeal searches… “How do I enable add-ons, how do I make two objects collide, etc.” For this blog, I learned how to add Math Function Meshes from this tutorial by Cly Faker.
Special thanks to Charlene MacPherson from NAT20 Therapy for having me on this project!


